
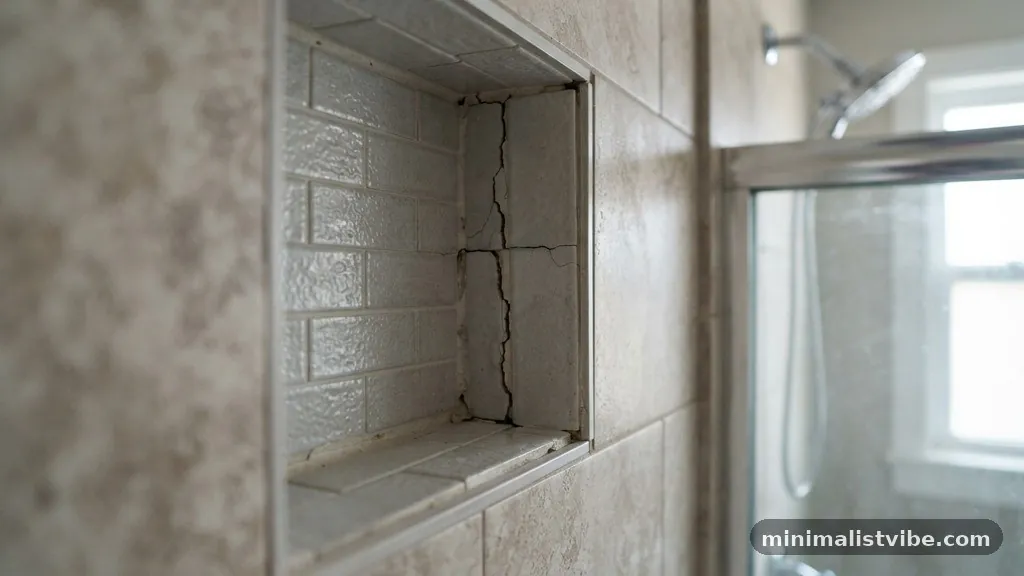
Why Did the Tile Grout Crack Inside the Corner of the Shower Niche?
Finding the tile grout crack inside the corner of the shower niche is a frustrating discovery that often indicates underlying movement or improper installation. While many homeowners assume this is merely a cosmetic issue, it frequently serves as a warning sign of potential water damage hidden behind the tile.
Understanding why these cracks develop is the first step toward a permanent repair, as simply applying more grout will almost certainly lead to the same problem recurring. By addressing the root cause, you can stop moisture infiltration and protect the integrity of your shower walls.
Understanding the Role of Structural Movement
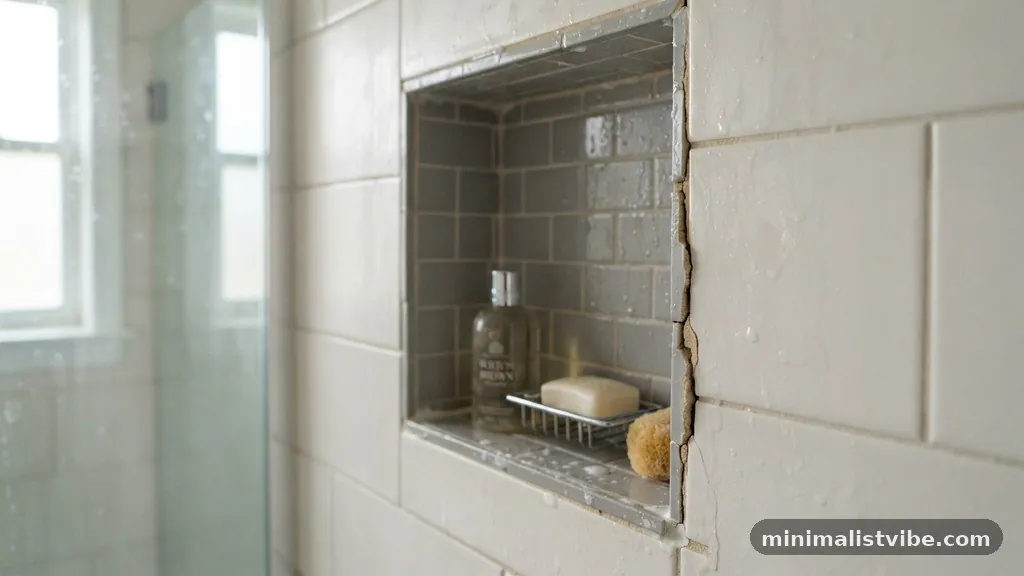
The most common reason for a crack appearing in a corner is that the two walls of the niche are moving independently of each other. Shower niches are essentially boxes built into the wall framing, and they are subject to constant stress. When you have a change in plane, such as where two walls meet at a 90-degree angle, you are dealing with a junction that is highly susceptible to structural movement.
Building materials like wood studs and cement board backer boards expand and contract with changes in temperature and humidity. Because these materials do not move in perfect unison, the joint between them experiences tension.
If you have used rigid grout in these corners, it cannot flex, so it snaps under the pressure. This is why professional installers emphasize that corners should never be grouted with standard cement-based products; they require a flexible solution that can accommodate the natural shifting of the house.
The Danger of Rigid Joints in Corners
When a tile installer uses hard, sanded, or unsanded grout in the corner joints of a shower niche, they are creating a rigid bridge between two surfaces that want to move. A tile installation is only as stable as the substrate underneath it, and in a shower, the substrate is constantly battling moisture and heat. Even minor framing settlement or the weight of the tile itself can cause enough micro-movement to compromise a brittle grout line.
If you observe hair-line cracks forming specifically along the vertical or horizontal seams of your niche, it is a clear indicator that the joint is under stress. Rigid grout acts like a piece of glass; it holds its shape until it reaches a breaking point, at which time it fractures.
Once that seal is broken, the niche is no longer waterproof. This leaves the edges of your tile exposed to water, which can travel behind the surface and begin to degrade the backer board or the wood framing hidden from view.
Why Thermal Expansion Causes Grout Failure
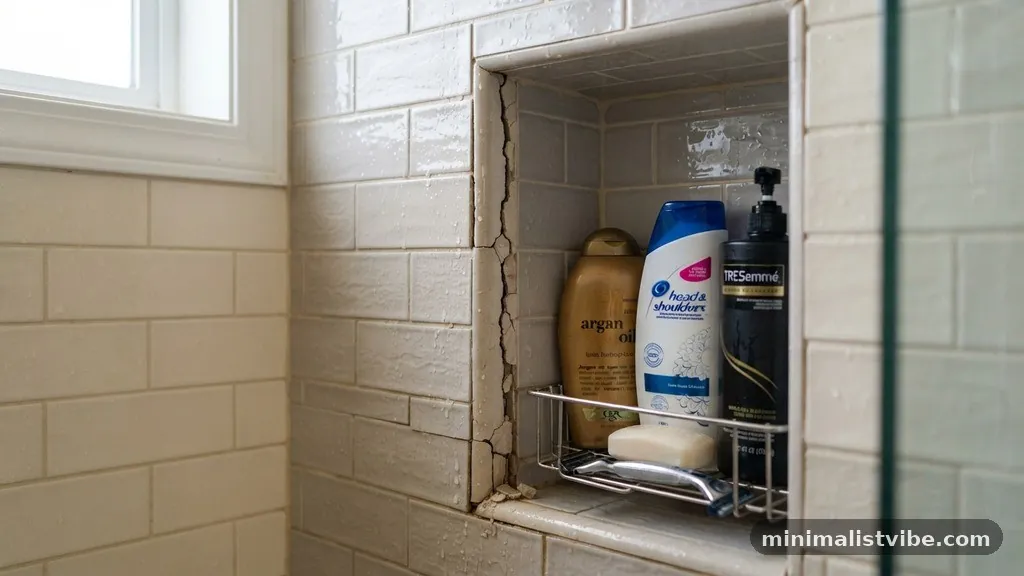
Shower environments are subjected to extreme temperature fluctuations that most other rooms in a home never see. Every time you run hot water for a shower, the tile and the mortar bed behind it expand as they heat up.
When the water is turned off and the shower cools down, these materials contract. This cycle of thermal expansion occurs daily, placing significant stress on the bond between your tiles.
Because a shower niche is an enclosed space with multiple corners, it is a focal point for this thermal tension. If the niche was not constructed with enough room for the materials to expand, the pressure has nowhere to go.
The grout at the corner acts as the weakest link in the system. Over time, the repeated expansion and contraction cycles weaken the chemical bond of the grout, leading to the characteristic cracking that homeowners often find after only a few months of regular use.
The Necessity of Flexible Silicone Sealants
To fix the issue properly, you must replace the rigid grout with a flexible sealant. Silicone sealant is the industry standard for these types of transitions because it is designed to stretch and compress without losing its adhesion. Unlike grout, which is a cementitious product, silicone remains pliable, allowing the two walls of the niche to move slightly without breaking the waterproof seal.
Many people make the mistake of trying to patch the crack with more grout, but this is a temporary fix that will fail again quickly. You must use a high-quality, 100% silicone caulk that is color-matched to your original grout. This ensures that the aesthetic remains consistent while providing the necessary mechanical flexibility.
Proper application involves cleaning the joint thoroughly and ensuring it is completely dry before laying down a clean bead of silicone. You can find detailed technical guidance on proper tile installation standards from the Tile Council of North America, which provides the authoritative framework for preventing these types of failures.
Addressing Subfloor Deflection and Framing Issues
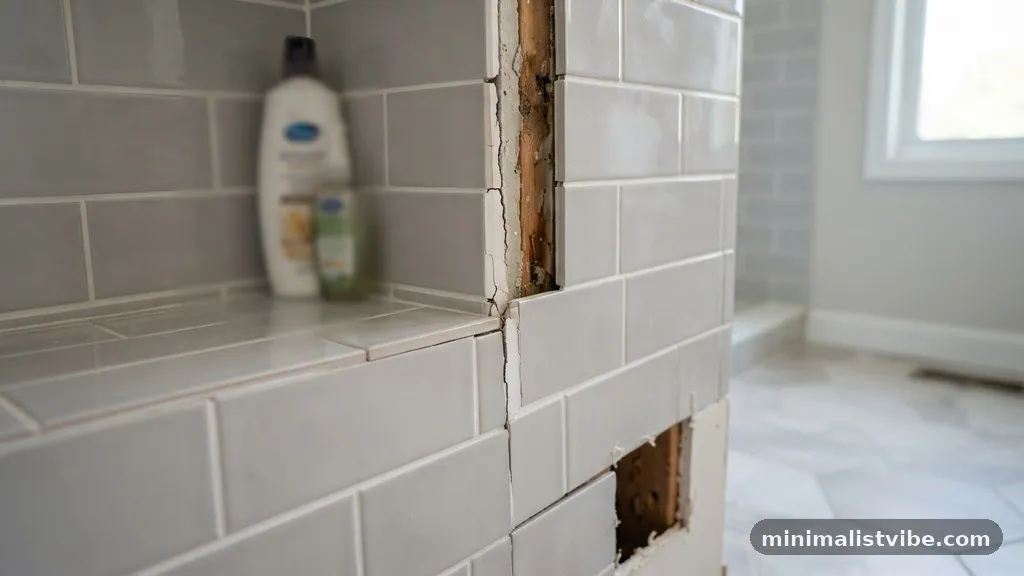
Sometimes, the cracking is not just about the niche itself but about the stability of the entire wall. If the floor joists or wall studs are not sufficiently rigid, the entire structure may experience what is known as subfloor deflection or wall flexing. When a house settles, or if the initial framing was not reinforced to support the weight of heavy tile and mortar, the walls will move more than they should.
If you see cracks appearing in the corner of your niche and also in the corners of the main shower walls, you likely have a larger structural issue. While you can mitigate the symptoms by using flexible caulk, you may find that the cracks return if the underlying movement is excessive. In cases where the wall feels “bouncy” or soft to the touch, you might be dealing with water damage that has already compromised the backer board or the wood framing, requiring a more significant repair than simple re-caulking.
The Risks of Moisture Infiltration
Water is the primary enemy of any tile installation. When you see a crack in the corner of your niche, you are looking at an open door for moisture infiltration.
Once water gets behind the tile, it begins to saturate the thin-set and the backer board. Over time, this leads to mold growth and the potential for rotting studs, which can cause thousands of dollars in structural damage if left unaddressed.
Hydrostatic pressure can push water through even the smallest hair-line cracks. Once the water is trapped behind the tiles, it has no way to evaporate, creating a perfect environment for black mold.
If you notice the grout turning dark or the tile feeling loose near the niche, you should investigate immediately. Ignoring these signs often leads to a situation where the entire niche must be demolished and rebuilt to remove the water-damaged materials and prevent further decay of the bathroom structure.
Why Grout Choice Matters During Installation
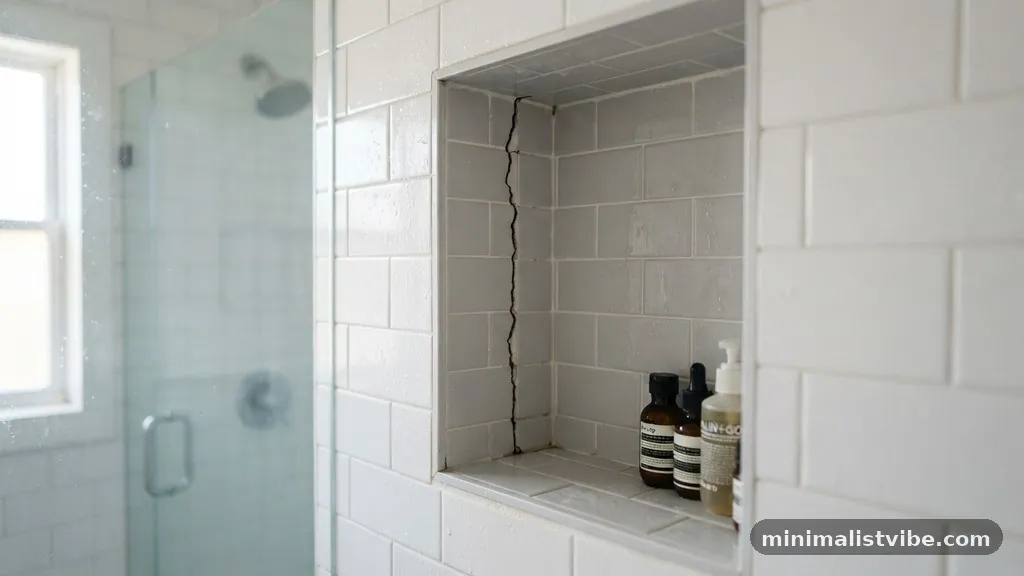
The type of grout used during the initial build is a major factor in how long your shower will remain crack-free. While many DIYers and even some contractors prefer standard sanded or unsanded grout for its ease of application, these products are inherently rigid. Epoxy grout, while much more durable and stain-resistant than standard cement grout, is also very rigid and should generally be avoided in corner joints for the same reasons.
When planning a shower project, the goal should be to use grout for the flat, stable areas and transition to a flexible caulk for all change-of-plane joints. If your installer used the same grout in the corners as they did on the main wall, they failed to account for the necessary movement joints. This is a common shortcut that saves time during installation but creates a long-term maintenance nightmare for the homeowner.
Proper Preparation Before Re-Caulking
If you have decided to fix the crack, preparation is the most important step. You cannot simply squeeze silicone over the old, cracked grout. You must remove the existing material to create a clean, deep cavity for the new sealant to grip.
Using a specialized grout saw, you can carefully cut out the old, failing grout. Be extremely cautious not to damage the waterproofing membrane or the tile edges while doing this.
Once the old material is removed, vacuum out all the dust and debris. Wipe the area down with rubbing alcohol to remove any soap scum, oils, or residue.
The silicone will not adhere properly to a dirty or damp surface, so ensuring the niche is bone-dry is essential. Using painter’s tape on either side of the corner joint before applying the silicone will help you achieve a clean, professional-looking line and prevent the sealant from smearing onto the tile faces.
The Importance of Movement Joints
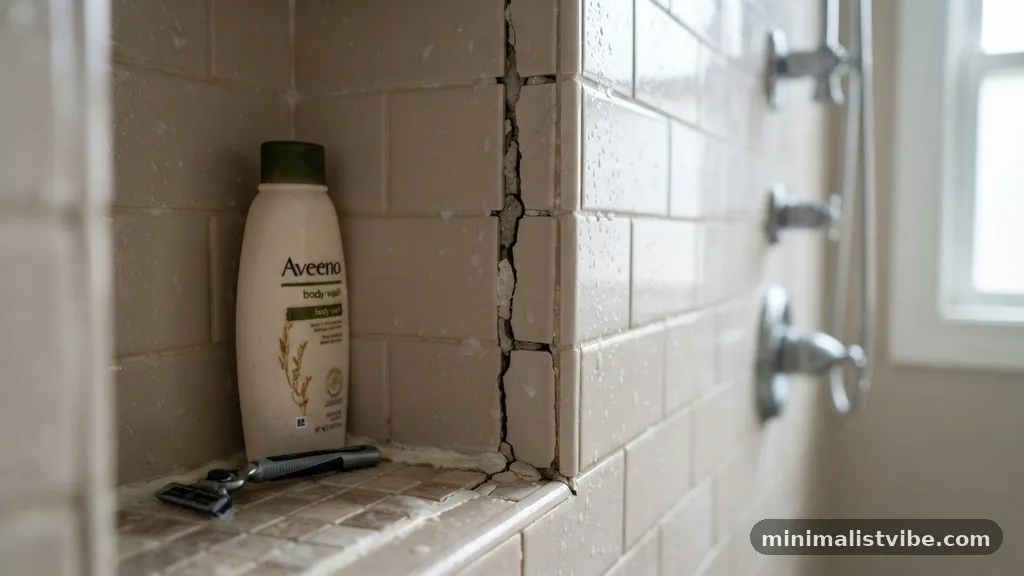
In the world of tile installation, a movement joint is a deliberate gap left between tiles that is filled with a flexible material rather than rigid grout. These joints are required by industry standards whenever there is a change in the plane of the wall. By treating the corner of your shower niche as a movement joint, you essentially acknowledge that the walls will shift and prepare for it.
Many installers use color-matched caulk that perfectly mimics the look of the surrounding grout. This allows the corner to blend in seamlessly with the rest of the wall while still providing the necessary functionality.
If you are having a new shower installed, insist that your contractor uses flexible sealant in all corners. It is a small detail that makes a massive difference in the longevity of your tile work and prevents the need for constant maintenance down the road.
Avoiding Common Mistakes in Niche Construction
Poor shower niche construction is often the root cause of persistent cracking. If the niche was not framed with the correct backer board or if it was not properly integrated with the building’s waterproofing membrane, it will never be truly stable. Some contractors fail to adequately waterproof the bottom sill of the niche, which is the most critical area for water management.
If the niche is not sloped slightly toward the shower floor, water will pool on the bottom ledge, increasing the likelihood of leaks and grout failure. When you are looking at a cracked corner, consider whether the niche was built to drain water effectively.
If the structure itself is poorly designed, you will likely continue to see issues regardless of how many times you replace the caulk. In such cases, a professional assessment is recommended to determine if the entire niche requires a rebuild to meet modern building codes.
FAQ
Is it normal for shower grout to crack in the corners?
While it is very common, it is technically an installation error. Corners in a shower are “change-of-plane” joints, which are subject to structural movement and thermal expansion.
Because these areas move, they should be filled with flexible silicone sealant rather than rigid, cement-based grout. If your grout is cracking there, it is a sign that the joint was not designed to accommodate natural movement.
Can I just apply more grout over the cracks?
You should never apply new grout over old, cracked grout. The new material will not have a proper mechanical bond, and because the underlying cause (movement) has not been addressed, the new grout will crack again within a few weeks. You need to remove the old material, clean the joint thoroughly, and replace it with a high-quality, flexible silicone sealant.
Should I worry about small cracks in my shower niche?
Yes, you should take them seriously. Even small hair-line cracks can allow water to seep behind your tiles.
Over time, this moisture leads to mold growth, the breakdown of the backer board, and potential damage to the wall studs. It is much cheaper and easier to replace a bead of caulk than it is to repair structural water damage inside your walls.
How do I know if the cracks indicate a structural problem?
If the cracks are limited to the corners of the niche and do not seem to be growing, it is likely just a routine maintenance issue caused by the lack of a flexible joint. However, if the tiles feel loose, if there is visible bowing in the wall, or if you can see larger gaps appearing, you may have a deeper issue with the framing or the substrate that requires a professional inspection.
What is the best way to remove old, cracked grout from a corner?
The best tool for this is a manual grout saw, which is specifically designed to fit into tight corners and remove material without damaging the surrounding tile. Work slowly and carefully, pulling the saw toward you to avoid slipping. Once the grout is removed, use a vacuum to clear the dust and finish the prep with a wipe of denatured alcohol to ensure the new sealant sticks.
Maintaining Your Shower Integrity
Addressing the Tile Grout Crack Inside the Corner of the Shower Niche is a manageable task if you follow the correct procedures. By understanding that these corners are meant to be flexible joints rather than rigid structures, you can move away from the cycle of constant patching. Always prioritize the use of high-quality, color-matched silicone sealant over cement-based products to ensure your shower remains a waterproof, mold-free environment.
If you find that the damage extends beyond the grout lines—such as loose tiles or soft spots in the wall—do not hesitate to consult a professional to prevent further water damage. Keeping an eye on these details allows you to catch issues before they turn into major repairs.
Taking the time to properly maintain your shower today will save you significant effort and expense in the long run. Feel free to reach out if you have more questions about your specific tile installation.